One of the comfort foods I have been asked to make and put up here is chicken and dumplings. I grew up eating mom's homemade chicken and dumplings and I wanted to try it out! So here's my version of it! (Mom, don't worry! I'll put up the original recipe soon!) This is very hearty with just a touch of heat. It makes for a great meal throughout the week. :)
Scary's Chicken and Dumplings
*Makes.... ummmm.... a pot full? A lot of servings! I fed 6 people several servings. Maybe close to 12-14 2 cup servings
20 C. Water
2 Basil Leaves (mine are kind of in pieces so it was hard to take them out at the end, but remove these when you serve!)
12 Chicken Bullion Cubes
5 Boneless Skinless Chicken Breasts
1 Celery Stalk
4 Red Bell Peppers
1 1/2 Onions
2 Jalapenos (seeds optional)
Salt, Pepper, Garlic Powder (at LEAST 2 tsp each but to taste)
Thickening liquid (1/4 C. flour and enough water to mix into a liquid)
Dumplings:
3 C. Flour
1/2 C. Shortening (pea sized chunks)
1 tsp. Baking Powder
2 tsp. Salt
2 tsp. Pepper
1 tsp. Sage
1 tsp. Rosemary
1 tsp. Parsley
1 tsp. Oregano
1 1/2 C. Water (give or take)
1. Put the water, bullion cubes, veggies, seasonings, and chicken in a stock pot. Bring to a boil and lower to med heat. Cook for about 45 mins to an hour.
2. Pull out the chicken and shred, or chop if you prefer cubed chicken. Put it back in the soup.
3. Put all the dry ingredients in a bowl with the shortening. Add the water a little bit at a time and mix. You don't want the dough to be too wet!! If you find that it's too wet, just add more flour or roll it out in a ton of flour.
4. Divide the dough into 3 balls and turn the heat up on the soup between med and med high. (I have limited counter space so I can't roll out a ton of dough at once). Roll it to about 1/8 inch thick and cut. Go crazy and use a pizza cutter!! Makes the job super easy! I made really big dumplings in these pictures, but I prefer smaller ones. It's all up to what you like.
5. Drop the dough pieces into the soup a few at a time. Once you're counter is clean, repeat until all the dough is made! You want to make sure and push the second and third group of dough down into the water so it doesn't hang out at the top and stick together.
6. Cook for about 10 mins and then turn the heat down to medium again. Here you're going to add the thickening liquid to make it more soupy instead of just watery. You can always add in more if you want it even thicker but keep in mind it gets thicker for the next 20 mins. Cook for another 20-30 mins, checking the done-ness of the dumplings.
Serve it up with some fresh french bread for dipping!
Saturday, September 28, 2013
Biscuits and Gravy
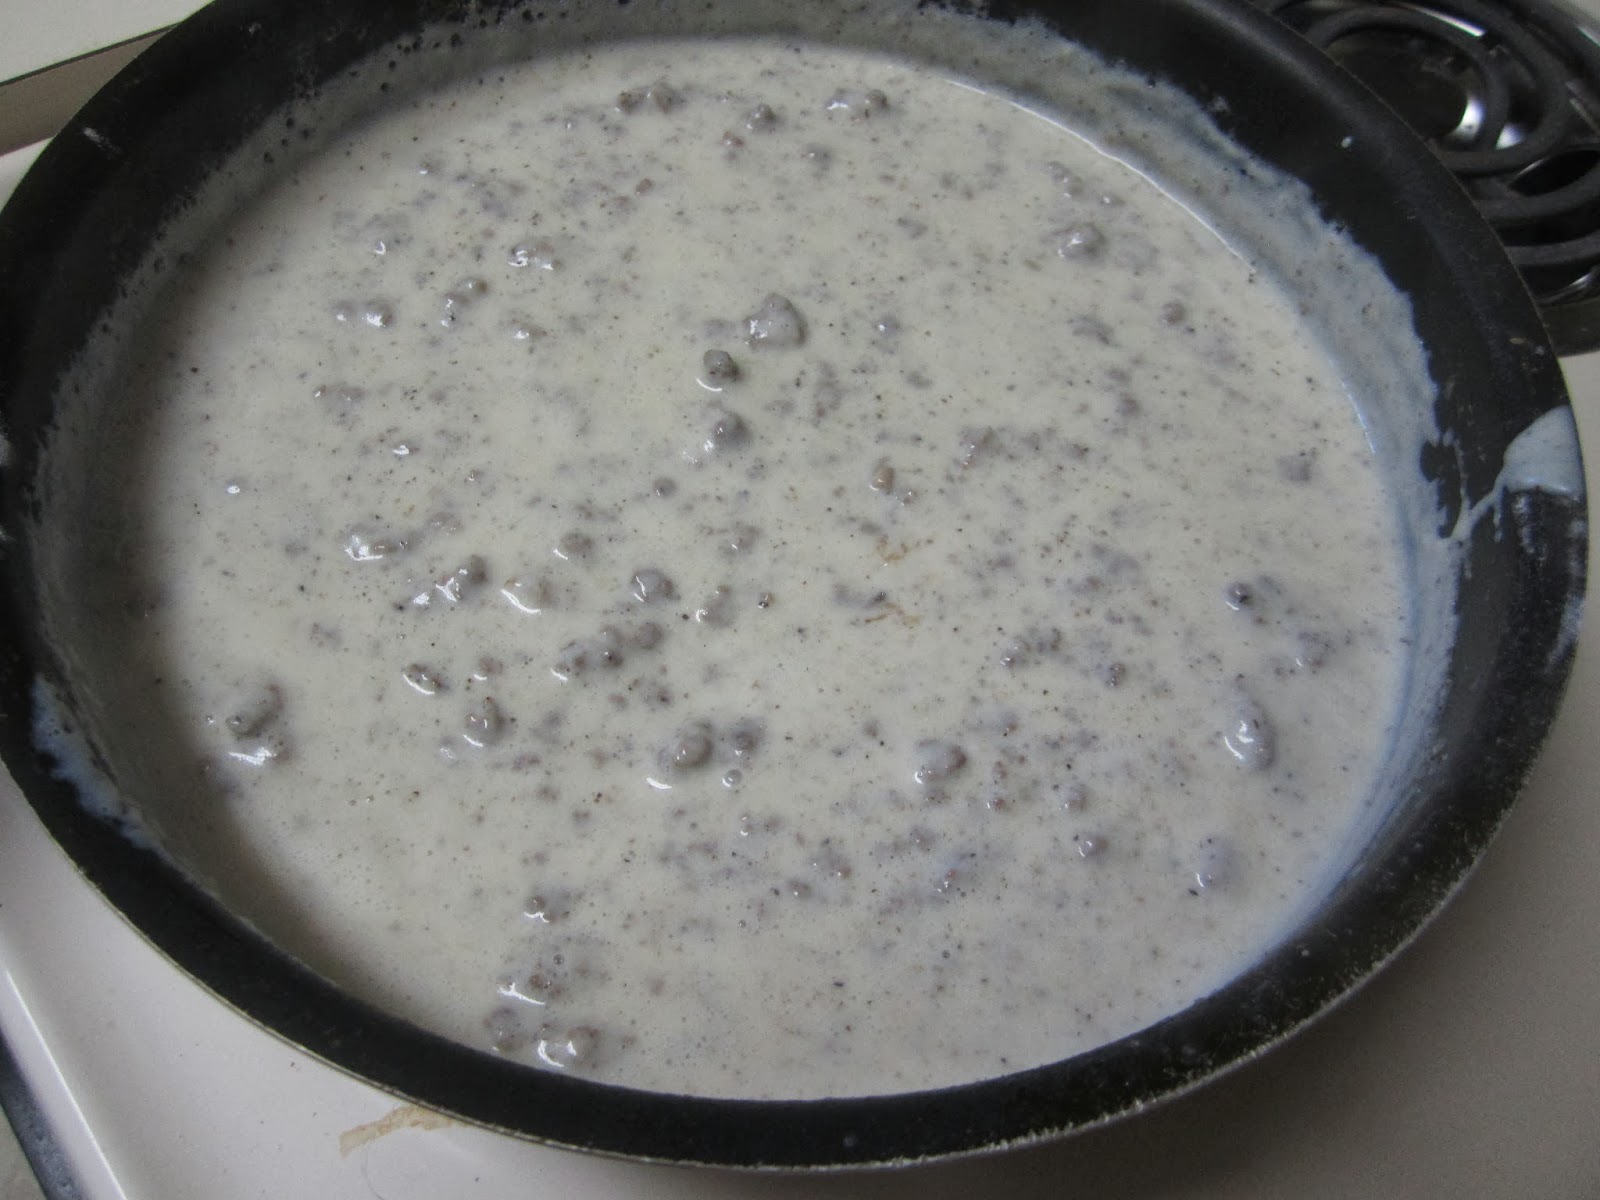
The ultimate comfort food when it comes to breakfast! Mom was always the major cook in the house but when it comes to breakfast, dad was the boss. :) His specialties are the most AMAZING pancakes ever (I'm sure I'll put that recipe up sometime) and his hamburger gravy to slather on some piping hot biscuits. This is not a traditional recipe but I prefer it over using sausage because it's still a unique flavor.
Dad's Hamburger Gravy
*makes 2-3 servings
1/2 lb. Hamburger
3-4 Tbsp. Flour
2 1/2 C. Milk
1 Tube of Biscuits
Salt and Pepper
1. Preheat oven for the biscuits. Start browning the hamburger. Be liberal with the salt and pepper. You don't want the meat to be bland once the gravy is made.
2. Once the hamburger is brown, add the flour and stir to coat the meat and absorb the grease.
3. Put the biscuits in the oven.
4. Keeping the heat at about med-high, add the milk and stir often until it starts to boil.
5. Lower the heat to med-low and simmer while it thickens. Still stirring often to make sure the gravy doesn't stick to the bottom of the pan.
6. Season with salt and pepper (heavy on the pepper). The biscuits should be done by now, pull them out and put it all together!
Dad's Hamburger Gravy
*makes 2-3 servings
1/2 lb. Hamburger
3-4 Tbsp. Flour
2 1/2 C. Milk
1 Tube of Biscuits
Salt and Pepper
1. Preheat oven for the biscuits. Start browning the hamburger. Be liberal with the salt and pepper. You don't want the meat to be bland once the gravy is made.
2. Once the hamburger is brown, add the flour and stir to coat the meat and absorb the grease.
3. Put the biscuits in the oven.
4. Keeping the heat at about med-high, add the milk and stir often until it starts to boil.
5. Lower the heat to med-low and simmer while it thickens. Still stirring often to make sure the gravy doesn't stick to the bottom of the pan.
6. Season with salt and pepper (heavy on the pepper). The biscuits should be done by now, pull them out and put it all together!
Dig in!!!
Saturday, September 14, 2013
Philly Cheese Steak Bites
There's a quaint place that I have to visit every time I'm in LA called Phillipes that is just to die for! I don't think I enjoy my french dip sandwiches as much anywhere else. I don't often make my own french dips or philly cheese steaks either, but hey why not take it for a spin!
Philly Cheese Steak Bites
*makes 12-16 bites
2 tubes of Crescent rolls
1 package of roast beef (using 2 slices per roll)
6-8 slices of cheese [usually provolone but I'm not a fan] (cut in half diagonally)
1/2 Onion (sliced)
1 Green Bell Pepper (sliced)
2-3 tsp. Olive Oil
1 packet Au Jus gravy
1. Put the oil in a skillet and add the veggies. Let these cook on one side for 5-8 mins and then stir/flip them as best as you can to the other side. When these are done, preheat the oven according to the rolls.
2. Open up the rolls and start separating them. Lay the cheese down on each roll with the long edges together.
3. Then layer 2 slices of roast beef, add 2 strips of bell pepper and 2-4 pieces of onion. Roll up and put on a cookie sheet lined with tinfoil and sprayed with non-stick spray.
4. Cook them for 10-12 mins.
5. Prepare the au jus while the rolls are cooking.
6. Serve it all up and enjoy!
(the roast beef tends to weep a little so the bottoms don't stay crisp, I recommend a fork and knife)
Philly Cheese Steak Bites
*makes 12-16 bites
2 tubes of Crescent rolls
1 package of roast beef (using 2 slices per roll)
6-8 slices of cheese [usually provolone but I'm not a fan] (cut in half diagonally)
1/2 Onion (sliced)
1 Green Bell Pepper (sliced)
2-3 tsp. Olive Oil
1 packet Au Jus gravy
1. Put the oil in a skillet and add the veggies. Let these cook on one side for 5-8 mins and then stir/flip them as best as you can to the other side. When these are done, preheat the oven according to the rolls.
2. Open up the rolls and start separating them. Lay the cheese down on each roll with the long edges together.
3. Then layer 2 slices of roast beef, add 2 strips of bell pepper and 2-4 pieces of onion. Roll up and put on a cookie sheet lined with tinfoil and sprayed with non-stick spray.
4. Cook them for 10-12 mins.
5. Prepare the au jus while the rolls are cooking.
6. Serve it all up and enjoy!
(the roast beef tends to weep a little so the bottoms don't stay crisp, I recommend a fork and knife)
Saturday, August 31, 2013
Sausage Sliders
Saturday morning is my favorite day to make breakfast (and usually the only morning in the week I can find the time). I was feeling a bit adventurous this morning since I've been living on fast food breakfast this week. :( I wanted to get a little crazy and make my own breakfast sandwich with a biscuit. The biscuits I use are small and fluffy and not hard and dense like McDonalds. It makes for a fun breakfast!
Sausage Sliders
*makes 8 sandwiches
1 Tube of Sausage (I use Jimmy Dean's Hot Sausage)
2 Slices of Cheese (My favorite is pepperjack!)
2 Eggs
1 Tube of Buttermilk Biscuits
Salt, Pepper
1. Preheat oven according to your biscuits. Get your pans ready for the sausage and eggs. Put the biscuits in as soon as it's ready.
2. Start cooking the sausage patties.
3. About the time you flip your sausages to the other side you can start frying your eggs. Season them as you like with salt, pepper, maybe some garlic or parsley. I personally don't like a ton of egg, but if you are an egg lover, then you can up how many eggs you actually use. I used two and cut them into quarters.
4. About this time, the biscuits should be close to done if they aren't already. When the saugage is done, put a 1/4 of the cheese slice on top to start melting.
5. Assemble everything and serve!
**These would have been awesome with some gravy to dip in, but I didn't have any. :(
Sausage Sliders
*makes 8 sandwiches
1 Tube of Sausage (I use Jimmy Dean's Hot Sausage)
2 Slices of Cheese (My favorite is pepperjack!)
2 Eggs
1 Tube of Buttermilk Biscuits
Salt, Pepper
1. Preheat oven according to your biscuits. Get your pans ready for the sausage and eggs. Put the biscuits in as soon as it's ready.
2. Start cooking the sausage patties.
3. About the time you flip your sausages to the other side you can start frying your eggs. Season them as you like with salt, pepper, maybe some garlic or parsley. I personally don't like a ton of egg, but if you are an egg lover, then you can up how many eggs you actually use. I used two and cut them into quarters.
4. About this time, the biscuits should be close to done if they aren't already. When the saugage is done, put a 1/4 of the cheese slice on top to start melting.
5. Assemble everything and serve!
**These would have been awesome with some gravy to dip in, but I didn't have any. :(
Sunday, August 18, 2013
Beef N Broccoli
I love me some yummy Chinese food. I'm suuuuuuuuuuuuper picky about stuff we order for takeout! That's why I started making my own stuff. :)
Beef and Broccoli is so simple yet can be so complex!! I decided to make a crock pot version and messed with it to make it yuuuuuuuuuummy!!! This is definitely a treat in my house this week!
Beef N Broccoli
*makes 4 servings
Allergen Tips:
Choose a gluten free soy sauce made by Kikkoman or Tamari.
1 lb. Flank Steak (Cut in strips and then cut in half)
1 C. Beef Broth (I used water and 2 cubes of bullion for a stronger flavor)
3 Cloves Garlic (minced)
1/2 C. Soy Sauce
1/3 C. Honey
1 Tbsp. Oil (sesame is recommended but vegetable works if you don't have it handy)
1/2 tsp. Salt
1/2 tsp. Pepper
2 Tbsp. Cornstarch
2-3 Heads of Broccoli (chopped)
3/4 C. Brown Rice
1 1/2 C. Water
1. Place beef in a crock pot.
2. In a small bowl, combine broth, soy sauce, honey, oil, garlic and salt/pepper. Pour over beef. Cook on low for 4-5 hours.
3. After that time, in a cup, stir cornstarch and just a little sauce from the crock pot until smooth. Add to crock pot. Stir well to combine. Repeat if it's not thick enough for you.
4. Add broccoli to the crock pot. Stir to combine.
5. Start the rice by mixing with water. Bring to a boil, cover and simmer for about 30 mins.
6. Cover beef and broccoli and cook an additional 30 minutes on high.
7. Combine and enjoy! :)
Beef and Broccoli is so simple yet can be so complex!! I decided to make a crock pot version and messed with it to make it yuuuuuuuuuummy!!! This is definitely a treat in my house this week!
Beef N Broccoli
*makes 4 servings
Allergen Tips:
Choose a gluten free soy sauce made by Kikkoman or Tamari.
1 lb. Flank Steak (Cut in strips and then cut in half)
1 C. Beef Broth (I used water and 2 cubes of bullion for a stronger flavor)
3 Cloves Garlic (minced)
1/2 C. Soy Sauce
1/3 C. Honey
1 Tbsp. Oil (sesame is recommended but vegetable works if you don't have it handy)
1/2 tsp. Salt
1/2 tsp. Pepper
2 Tbsp. Cornstarch
2-3 Heads of Broccoli (chopped)
3/4 C. Brown Rice
1 1/2 C. Water
1. Place beef in a crock pot.
2. In a small bowl, combine broth, soy sauce, honey, oil, garlic and salt/pepper. Pour over beef. Cook on low for 4-5 hours.
3. After that time, in a cup, stir cornstarch and just a little sauce from the crock pot until smooth. Add to crock pot. Stir well to combine. Repeat if it's not thick enough for you.
4. Add broccoli to the crock pot. Stir to combine.
5. Start the rice by mixing with water. Bring to a boil, cover and simmer for about 30 mins.
6. Cover beef and broccoli and cook an additional 30 minutes on high.
7. Combine and enjoy! :)
Saturday, July 27, 2013
Canning and Salsa Excitement!
Well as some of you know, I'm going to start canning and selling my salsas in the near future. And let me tell you, I can hardly contain my excitement! It's been nonstop research and buying necessities to make this happen. I feel that the money dumped into this idea isn't going to be money wasted even if this salsa selling turns out to be a flop. (which it won't!!!)
I just dropped the last chunk of money necessary to get started on a pressure cooker/canner! I can't even explain how excited I am to have one in my possession!!! My pressure cooker was given to me when my grandpa died. It was well loved, and used a ton. There was an unfortunate accident in my kitchen (NO ONE was harmed thank God) and it's now useless as a pressure cooker. I just didn't want to drop the money on a replacement. But NOW I have several reasons!!!
I just bought this beast of a cooker!
This is the All American 921 Pressure Cooker/Canner. I went biiiiiiiiiig and got the 21 1/2 quart for just over $200. This beast can process up to 19 pint size jars at a time and that's the size I'm going with for my salsas! What a deal!!!
I honestly can't wait to get it on Wednesday to take it for a spin!!!
I just dropped the last chunk of money necessary to get started on a pressure cooker/canner! I can't even explain how excited I am to have one in my possession!!! My pressure cooker was given to me when my grandpa died. It was well loved, and used a ton. There was an unfortunate accident in my kitchen (NO ONE was harmed thank God) and it's now useless as a pressure cooker. I just didn't want to drop the money on a replacement. But NOW I have several reasons!!!
I just bought this beast of a cooker!
This is the All American 921 Pressure Cooker/Canner. I went biiiiiiiiiig and got the 21 1/2 quart for just over $200. This beast can process up to 19 pint size jars at a time and that's the size I'm going with for my salsas! What a deal!!!
I honestly can't wait to get it on Wednesday to take it for a spin!!!
Friday, July 19, 2013
Roasted Green Chiles
Have you ever wanted a batch of fresh green chile but you just don't live in an area where you can get them easily? Sure, you can go to the store and buy a frozen block of Hatch's (and let's be honest, they ARE the best) but it's still just not the same. Well here's how to make your own homemade roasted green chiles that you can chop up and use immediately or you can freeze some for later. I just think it's way better than buying the little cans of green chiles. Those are just best when you're in a bind and have nothing else but really need chiles!
Roasted Green Chiles
*Makes however many chiles you roast
**This can be done with any type of pepper!!
8-10 Anaheim Chiles (this is how many will fit per cookie sheet depending on how big they are and this will make about a cup chopped)
Non stick Spray
Tin Foil
1. Set your oven to broil and put a rack on the very top shelf.
2. Line a cookie sheet with tin foil and spray with the non stick spray.
3. Arrange the peppers on the sheet.
4. When the oven is good and ready, put the sheet in the oven. Keep a close eye on them. The first side can take from 3-6 mins. You want the skin to be mostly black and bubbly, but not completely black or else the chile itself will be burnt.
5. Turn the chiles over when the first side is ready. This side should take a little less time since the chiles are already hot.
6. Once the second side is mostly bubbly and black, take them out and put them all in a ziploc bag. Let them steam for 20 mins.
7. Carefully take them out one by one to peel the skin off and take the tops off. Prepare the chiles as you like: diced, strips, whole. Use to your hearts content!
Roasted Green Chiles
*Makes however many chiles you roast
**This can be done with any type of pepper!!
8-10 Anaheim Chiles (this is how many will fit per cookie sheet depending on how big they are and this will make about a cup chopped)
Non stick Spray
Tin Foil
1. Set your oven to broil and put a rack on the very top shelf.
2. Line a cookie sheet with tin foil and spray with the non stick spray.
3. Arrange the peppers on the sheet.
4. When the oven is good and ready, put the sheet in the oven. Keep a close eye on them. The first side can take from 3-6 mins. You want the skin to be mostly black and bubbly, but not completely black or else the chile itself will be burnt.
5. Turn the chiles over when the first side is ready. This side should take a little less time since the chiles are already hot.
6. Once the second side is mostly bubbly and black, take them out and put them all in a ziploc bag. Let them steam for 20 mins.
7. Carefully take them out one by one to peel the skin off and take the tops off. Prepare the chiles as you like: diced, strips, whole. Use to your hearts content!
Subscribe to:
Posts (Atom)