Showing posts with label Stove Top. Show all posts

Sunday, September 6, 2015

Cheesy Pot Pie Casserole


It’s Friday afternoon and I’m racing through Fry’s Grocery in Scottsdale, AZ.  I waited until the very last minute to buy everything for the camping trip I had planned.  As I ogle the massive veggie section of this Fry’s, I start to run down the list of items I need to feed everyone for the 3 day weekend.  I grab an onion here, a bell pepper there, a few carrots, some celery, and the list goes on and on.  I added in some chicken, a little pasta, and some stuff to make things saucy!  This is going to be a healthy twist on some serious pot pie flavors.

Fast forward to Saturday night where I’m prepping and whipping up a casserole that puts most of my others to shame.  This casserole has the flavor of a high calorie dish but the actual calorie count of something much healthier.  Learning the balance of fats to veggies to proteins can be vital when you’re trying to create healthier dishes in your home.  For instance, you can use evaporated milk in place of half and half or heavy cream (depending on the dish).  This allows the dish to stay creamy but with fewer calories.

This dish is not only healthy, but the clean up is a cinch.  The majority of the dish is cooked in one pot through different stages.  This not only prevents a ton of pot and pan clean up, but it means you’re paying more attention to what’s in front of you rather than spreading yourself too thin across the stove top if you’re not comfortable doing that every night.  And who doesn’t love fewer dishes?


Cheesy Pot Pie Casserole


Prep Time:
Cooking Time:
Serves: 10

8 oz whole wheat egg noodles
1 Tbsp Olive Oil
2 red bell peppers, chopped
1 large onion, chopped
2 medium carrots, peeled, quartered length wise and chopped
3 celery stalks, chopped
1 tsp. fresh minced thyme
3 cans low sodium chicken broth (14-16 oz)
1 can fat free evaporated milk (5 oz)
3 Tbsp cornstarch
2 boneless skinless chicken breasts (halved length wise)
8 oz light Mexican blend cheese
½ c. frozen peas
¾ c. Panko bread crumbs
1 tsp. parsley
½ tsp. garlic powder
2 tsp. Salt
1 ½ tsp pepper

1. Bring a pot full of water to boil.  This will be the only pot you use through the whole dish, make sure it’s a decent size one.  Once boiling, add in the pasta and cook it al dente (cooked just enough to bite through, but it’s still firm).  This should take about 5 minutes.
2. Drain the noodles, rinse until cool and then set aside in a bowl.
3. In the original pot, pour in the olive oil and turn up to medium high heat.  Once the oil is hot, stir in the bell peppers, onion, celery, and carrot.  Sprinkle them with just a pinch of salt.  Cook these until the onions are transparent and the carrots are just soft enough that you’re not crunching through them.
4. Toss in the thyme and stir the veggies for another minute.  Transfer veggies to a second bowl.
5. Combine the evaporated milk and 2 of the cans of chicken broth in the pot.  Bring to a boil.  Once it’s at a rolling boil, add the chicken to cook.
6. Once the chicken is cooked through, about 15 minutes or to 155 degrees internally, pull it out of the liquid.  Remove the pot from the hot burner and shred the chicken into bite size pieces.  Heat your oven to 425 degrees at this point.
7. Whisk 5 Tbsp of chicken broth in with the cornstarch.  Bring the pot back to a boil with remaining chicken broth to replenish what boiled off while cooking the chicken.  Add the cornstarch mixture once it’s boiling to thicken.  After 1 minute, remove from heat and whisk in the cheese until smooth.
8. Throw in the chicken, the veggies, the noodles, and the peas.  Season with 1 ½ tsp salt and 1/ ½ tsp pepper.  Mix it well and pour into a 9X13 inch baking dish.
9. Mix the Panko with the parsley and garlic.  Sprinkle on top of casserole.  Put in the oven for 15 minutes or until the top is golden brown and the cheese is bubbling.

Thursday, January 22, 2015

"Perfect" Steak Tips and Tricks

I've made a lot of steak in my day but before we moved down to Phoenix, we had a grill.  That was easy peasy and the staple of our Friday night grill/game night.  Once we moved to Phx, I had to grow up a little (ok a lot) in the cooking without a grill department!  We were gifted a small George Foreman by an aunt and that was one of the best indoor inventions ever.  But it just doesn't do steak justice.  So I use that for chicken and veggies.
I ended up finally getting myself an inexpensive cast iron pan (as any well stocked kitchen should have) and I have yet to regret my $12 spent!  Here are some tips and tricks I've learned in my researching for making the "perfect" steak!


  • Heat the pan on High but cook the steak on Medium heat.
  • Let the meat rest at room temperature for at least 30 minutes before cooking.
  • Pat the steak as dry as you can get it to prevent "steaming" while cooking.
  • Before seasoning, use a basting brush and cover both sides with Worcestershire sauce.
  • Some people believe that salting before cooking is a bad idea.  I say to each his own.  I love to have the salt in the crust of the steak. :)
  • For a 1" steak (kind of a guideline to adjust based on thickness):  Medium Rare: 2.5 mins on each side, 1.5 mins in 400 degree oven, Medium: 3 mins on each side, 2.5 mins in 400 degree oven, Well done: 4 mins on each side, 3 mins in 400 degree oven.
  • If you're doing a compound butter, slab it on top before you put it in the oven.
  • Don't trim the fat off the steak until after it's cooked.  This gives it more flavor while cooking.
  • If you don't finish the steak in the oven, cook on both sides twice.  Usually about 2-3 mins for each flip.
  •  Always remember that a steak continues to cook even after it's out of the pan.
  • Compound butters can be made with just about anything in your pantry.  They make a perfect topping if you want just a little more than the steak by itself.  Once mixed REALLY well, wrap in parchment paper and freeze for when you need it.  Don't be afraid to get creative and fresh herbs give it just a touch of color!
  • Try to shoot for steaks that are at least an 1" thick.  Anything thinner tends to dry out much quicker.
As I come across more tips and tricks I'll continue to add to the list!  These are just some of the different helpful things floating around out there!


Saturday, August 2, 2014

Mom's Texas Sheet Cake

My mother told me the story of how we came into the posession of this recipe.  It's pretty neat actually.  A lady called up my grandmother and asked if it would be ok to bring a cake to my parent's reception.  My grandmother agreed and so this kind lady brought a Texas sheet cake to the party.  It was a nice contrast so the guests had their choice of chocolate or vanilla wedding cake.  My mother fell in love with the cake and spent years trying to track her down for the recipe.  Once she got her hands on it, she made it as often as possible!  I rarely remember desserts unless it was this or her Blue Ribbon Carrot Cake sitting on the counter! :)

Mom's Texas Sheet Cake


*Makes 1 11X17 pan full of cake **cookie sheet for those who don't have their tape measures handy :P

Cake:
1 Stick of Butter
1/2 C. Crisco
4 Tbsp. Cocoa Powder
1 C. Water
2 C. Flour
2 C. Sugar
1/2 C. Buttermilk
2 Eggs (slightly beaten)
1 tsp. Baking Soda
1 tsp. Cinnamon
1 tsp. Vanilla

Frosting:
1 Stick of Butter
4 Tbsp. Cocoa Powder
6 Tbsp. Milk
1 lb. Powdered Sugar (sift!)
1 tsp. Vanilla

1. Heat oven to 350 degrees.
2. Grease and flour a cookie sheet.
3. In a saucepan, (for the cake) melt butter, crisco, coaco, and water.  Bring to a rapid boil.
4. In a bowl, add flour and sugar.  Pour the melt over this and stir.
5. Add buttermilk, eggs, baking soda, cinnamon and vanilla and stir.  Don't over work it *don't want to activate the glutens*.  Just stir enough to get the lumps out.
6. Pour into the cookie sheet and bake for 20 minutes.
7. **15 minutes into the cake baking**  In a saucepan, (for frosting) melt butter, cocoa, and milk.  Bring to a boil.  Add the powdered sugar and vanilla.  Mix well, keep stirring until it's smooth.
8. At this point the cake should be just about done.  Pull it out and frost while the cake is STILL HOT.  This allows the frosting to melt more and seep into the pores of the cake!
9. You can stop here and let the cake cool or you can go one step further and sprinkle chopped pecans on top before the frosting hardens.


*fun fact, this cake is great for freezing!  Cut up and wrap individual size pieces in saran wrap and store in a Ziploc bag*

Thursday, February 6, 2014

Green Chile Chicken Soup

When you're sick, soup is the staple of your diet.  I've been sick for almost a week now and man do I get tired of Chicken Noodle quick!  So instead of busting out my Chicken and Dumplings (too much work when I'm sick) I went into the kitchen with no thoughts or recipes in my head.  And here's what I ended up with!  It's got just a tiny kick (unless you know you're in possession of super spicy green chiles) and it's really low in calories but super filling.  It's also really easy to keep.  You can freeze it or seal it in jars using a pressure canner.

Green Chile Chicken Soup


*makes 12 2 cup servings

Allergen Tips:
Look for gluten free brands of enchilada sauce like La Victoria or Frontera.
Check the bullion for gluten to keep it a g-free recipe!

12 Cups of Water
7 cubes of Chicken Bullion
3 Boneless Skinless Chicken Breasts
4 Stalks of Celery (chopped)
2 Red Bell Peppers (chopped)
1 C. Chopped Onion
4 Fresh Roasted Green Chiles (chopped) **or 2-3 4oz cans of green chiles**
2 cans Black Beans (drained)
2 cans Corn (drained)
1 14-16oz Can Green Enchilada Sauce (size varies depending on brand)
1 tsp. Salt
1 tsp. Garlic Powder
1 tsp. Pepper
1 tsp. Cumin
1-2 Tbsp Corn Starch for thickening

1. Put the water and bullion cubes in a stock pot on medium heat until it starts boiling and the cubes are dissolved.
2. Throw in the chicken breasts, beans and veggies and the sauce.  Cover back up and cook for about 45-75 depending on if the chicken is fresh or frozen.
3. Once the chicken is done, pull it out and shred.  Add back to the soup along with the seasonings and simmer for another 30 mins to let the chicken soak up some flavor.
4. Serve!

*Tips on adding to this if you'd like a little more*
You can make some rice to pour this over or you can make some noodles to throw in but if you plan on keeping this in the fridge or freezer, I don't suggest adding these until you're about to eat it.


Saturday, February 1, 2014

Spinach and Ricotta Lasagna Rolls

In my journey to get healthy and eat healthy, I decided to revamp some of my recipes and this will be the first!  I love lasagna but for two people, a whole lasagna is just too much!  So I decided to go with little serving sized rolls that are easy to portion out instead of guessing how much you cut off!  These are still not "super healthy" but calorie wise they're ideal for those Italian food hankerings!

Spinach and Ricotta Lasagna Rolls


*Makes 3 servings

Allergen Tips:
Rice flour noodles are a great g-free option for any pasta dish!

6 Lasagna Noodles
3/4 C. Ricotta (I use low fat)
1/4 C. Mozzarella
1/8 C. Parmesan
1/2 lb. Ground Turkey
1/2 jar Favorite Marinara (I use Classico Italian Sausage)
1/4 C. Red Bell Peppers (chopped)
1/4 C. Onion (chopped)
2 tsp. Olive Oil
1/3 C. Raw Spinach
Salt, Pepper, Garlic Powder, Italian Seasonings

1. Get the pot of water for the noodles going.  Make sure you add salt to help boil the water quicker (you'd be surprised how many people don't know this!)
2. Start cooking the bell peppers and onions in the oil.
3. Once the water is boiling, add the spinach to the water.  Boil it for 4-5 mins and then pull it out of the water and let it hang out in a strainer.  **DO NOT DUMP THE WATER OUT**  Separate it to the best of your abilities to help the water drain.  Add in the lasagna noodles to the same water.
4. Throw the turkey in the pan with the peppers and onions.  Season the meat and brown.  Once the meat is done, you can set aside until everything else is ready.\
5. Mix the ricotta with the parmesan and most of the mozzarella.  Save just a touch for the tops of the rolls.
6. Once the noodles are done, drain and lay out on the counter or on a cutting board.  Dab them with a paper towel so they aren't slimy where you'll be spreading out the cheese.
7. At this point, you need to squeeze out the spinach.  Use a bunch of paper towels or a potato ricer.  Chop it up and mix it in with the ricotta cheese mixture and start spreading on the noodles.  Start small and go from there.  You want to make sure there's an even amount of cheese on each!
8. Turn the oven on to 325 degrees.  Once the cheese is on the noodles, sprinkle the turkey on top.


9. Start rolling the noodles and place in a non-stick sprayed 6x9 baking dish.  (you can spread just a touch of marinara on the bottom to help prevent sticking as well)
10. Add the marinara to the remaining ground turkey and pour on top of the rolls.  Top them with the last of the mozzarella and bake for 25 mins!


Sunday, January 19, 2014

Lasagna Cups

I love Italian food and who doesn't love lasagna!  To be honest I can't remember the last time I had a real chunk out of a lasagna.  I occasionally make my Lasagna Rolls but today I wanted to make cups that we could pick up with our hands because finger food is fuuuuuun!!!  They turned out amazing and the nutrition facts are pretty sweet as well!

Lasagna Cups


*makes 12 cups, serves 4

24 Wonton Wrappers
1/2lb Ground Turkey
1/4 C. Onion (chopped)
1 C. Favorite Marinara (I use Classico Italian Sausage)
1/3 C. Ricotta (low fat)
1/8 C. Parmesan
1/4 C. Mozzerella
Salt, Pepper, Garlic Powder, Italian Seasonings (to taste)

1. Brown meat and onions.  Season to taste with all of the above seasonings.
2. Add the marinara and simmer for a minute or two.
3. Preheat the oven to 325 degrees.  spray muffin pan(s) with non-stick spray.  Line each with a wonton wrapper.
4. Mix the ricotta with most of the parm and mozzerella (saving just a touch of both for the top of the cups).
5. Spoon the meat mixture (I use a large spoon, about a heaping tablespoon?) into the wrapper.  Top this with about a teaspoon of cheese mixture.


6. Add a wonton wrapper on top of the cheese.  Pushing down to compact the ingredients.  Add another teaspoon of cheese to the bottom, then top it with another heaping tbsp of meat.
7. Top each cup with just a touch of the leftover mozzerella and parmesan.  Bake for 20 mins.


Saturday, January 11, 2014

BBQ Chicken Bites with Slaw

If any of you know me, I loooooooooove chicken!  I also love wonton wrappers!  Put them together and the possibilities are literally endless!  Today I wanted some BBQ flavor in my dinner.  So I put together a healthy version of a classic BBQ chicken with coleslaw!

BBQ Chicken Bites with Slaw


*makes 12 bites

12 wonton wrappers
1 large boneless skinless chicken breast (boiled and shredded)
1/2 serving of my BBQ marinade
1/2 Red Bell Pepper
 
Shred the following:
1/3 Head of Cabbage
1 Carrot
1 Jalapeno (make sure to remove seeds)

3 Tbsp Fat Free Italian Dressing
Salt and Pepper to taste

1. Boil your chicken for 35-45 mins.  Pull out and shred.  Set oven to 325 degrees and spray muffin pan(s) with non-stick spray.
2. Mix in the marinade, bell peppers, and salt and pepper.
3. Put wrappers in each muffin hole, pushing it down to cover the bottom.
4. Fill the wrappers with the chicken mixture and put in the oven for 20-30 mins.  Keep in mind, this recipe is a bit more wet than normal so baking a little bit longer will keep the wrapper more crisp.


5. While the bites cook, shred the veggies, add the dressing and seasonings.  Mix and refridgerate until the bites come out of the oven.
6. Put it all together and enjoy a classic bbq meal with a twist!


These NF are with Sweet Baby Ray's BBQ sauce, not Bill Johnsons

Sunday, October 20, 2013

Olive Garden's Zuppa Toscana!

Who doesn't love a little soup and salad for lunch every once in a while?!  Well, my absolute favorite at Olive Garden is the Zuppa.  I get it every time!  MMMMMMMM dipping hot fresh breadsticks in that soup is heavenly.  Well, I decided to try the recipe my mom put together and see if it's anything like the real soup.  Boy was I amazed!  It tastes JUST like it!  I made it a little healthier using turkey instead of spicy Italian sausage.  But I honestly couldn't really tell the difference.  :D

Zuppa Toscana


*Makes 6-7 2 cup servings

Allergen Tips:
Make sure you check the bullion and bacon for gluten ingredients to keep this a g-free recipe!

1-1.25 lbs of Ground Turkey (or Spicy Italian Sausage)
(season with Italian seasonings, red pepper flakes, salt, pepper, and garlic if you're doing the turkey)
1/2 lb. Smoked Bacon (chopped)
10 C. Water
4 Chicken Bullion Cubes
1 Med Onion (chopped)
2 Large (or 3 med) Russet Potatoes (sliced)
2 Cloves of Garlic (minced)
2 C. Kale (chopped)
1 C. Heavy Cream
Salt and Pepper to taste

1. Add water and bullion cubes to a pot and cover.  Put on med-low to dissolve.
2. In a pan, brown the turkey, adding the seasonings as it cooks.  Drain and put aside in a bowl.


3. Cook the bacon in the pan, drain, and add to the turkey.


4. Add the sliced potatoes, garlic, and onion to the pot.  Bring to a low boil and simmer on med with the lid off until the potatoes are tender.


5. Add the meats, bring to a low boil and simmer for another 10 mins.
6. Add the kale and cream, season the soup with salt and pepper.  Doesn't need to boil, just warmed through, and it's ready to serve!


And here's a jar of the soup with my label to sell :)

(this soup must be kept fresh, it's not canned)

Saturday, September 28, 2013

Scary's Chicken and Dumplings

One of the comfort foods I have been asked to make and put up here is chicken and dumplings.  I grew up eating mom's homemade chicken and dumplings and I wanted to try it out!  So here's my version of it!  (Mom, don't worry!  I'll put up the original recipe soon!)  This is very hearty with just a touch of heat.  It makes for a great meal throughout the week. :)

Scary's Chicken and Dumplings


*Makes.... ummmm.... a pot full?  A lot of servings!  I fed 6 people several servings.  Maybe close to 12-14 2 cup servings

20 C. Water
2 Basil Leaves (mine are kind of in pieces so it was hard to take them out at the end, but remove these when you serve!)
12 Chicken Bullion Cubes
5 Boneless Skinless Chicken Breasts
1 Celery Stalk
4 Red Bell Peppers
1 1/2 Onions
2 Jalapenos (seeds optional)
Salt, Pepper, Garlic Powder (at LEAST 2 tsp each but to taste)
Thickening liquid (1/4 C. flour and enough water to mix into a liquid)

Dumplings:
3 C. Flour
1/2 C. Shortening (pea sized chunks)
1 tsp. Baking Powder
2 tsp. Salt
2 tsp. Pepper
1 tsp. Sage
1 tsp. Rosemary
1 tsp. Parsley
1 tsp. Oregano
1 1/2 C. Water (give or take)

1. Put the water, bullion cubes, veggies, seasonings, and chicken in a stock pot.  Bring to a boil and lower to med heat.  Cook for about 45 mins to an hour.


2. Pull out the chicken and shred, or chop if you prefer cubed chicken.  Put it back in the soup.
3. Put all the dry ingredients in a bowl with the shortening.  Add the water a little bit at a time and mix.  You don't want the dough to be too wet!!  If you find that it's too wet, just add more flour or roll it out in a ton of flour.
4. Divide the dough into 3 balls and turn the heat up on the soup between med and med high.  (I have limited counter space so I can't roll out a ton of dough at once).  Roll it to about 1/8 inch thick and cut.  Go crazy and use a pizza cutter!!  Makes the job super easy!  I made really big dumplings in these pictures, but I prefer smaller ones.  It's all up to what you like.


5. Drop the dough pieces into the soup a few at a time.  Once you're counter is clean, repeat until all the dough is made!  You want to make sure and push the second and third group of dough down into the water so it doesn't hang out at the top and stick together.


6. Cook for about 10 mins and then turn the heat down to medium again.  Here you're going to add the thickening liquid to make it more soupy instead of just watery.  You can always add in more if you want it even thicker but keep in mind it gets thicker for the next 20 mins.  Cook for another 20-30 mins, checking the done-ness of the dumplings.


Serve it up with some fresh french bread for dipping!

Biscuits and Gravy

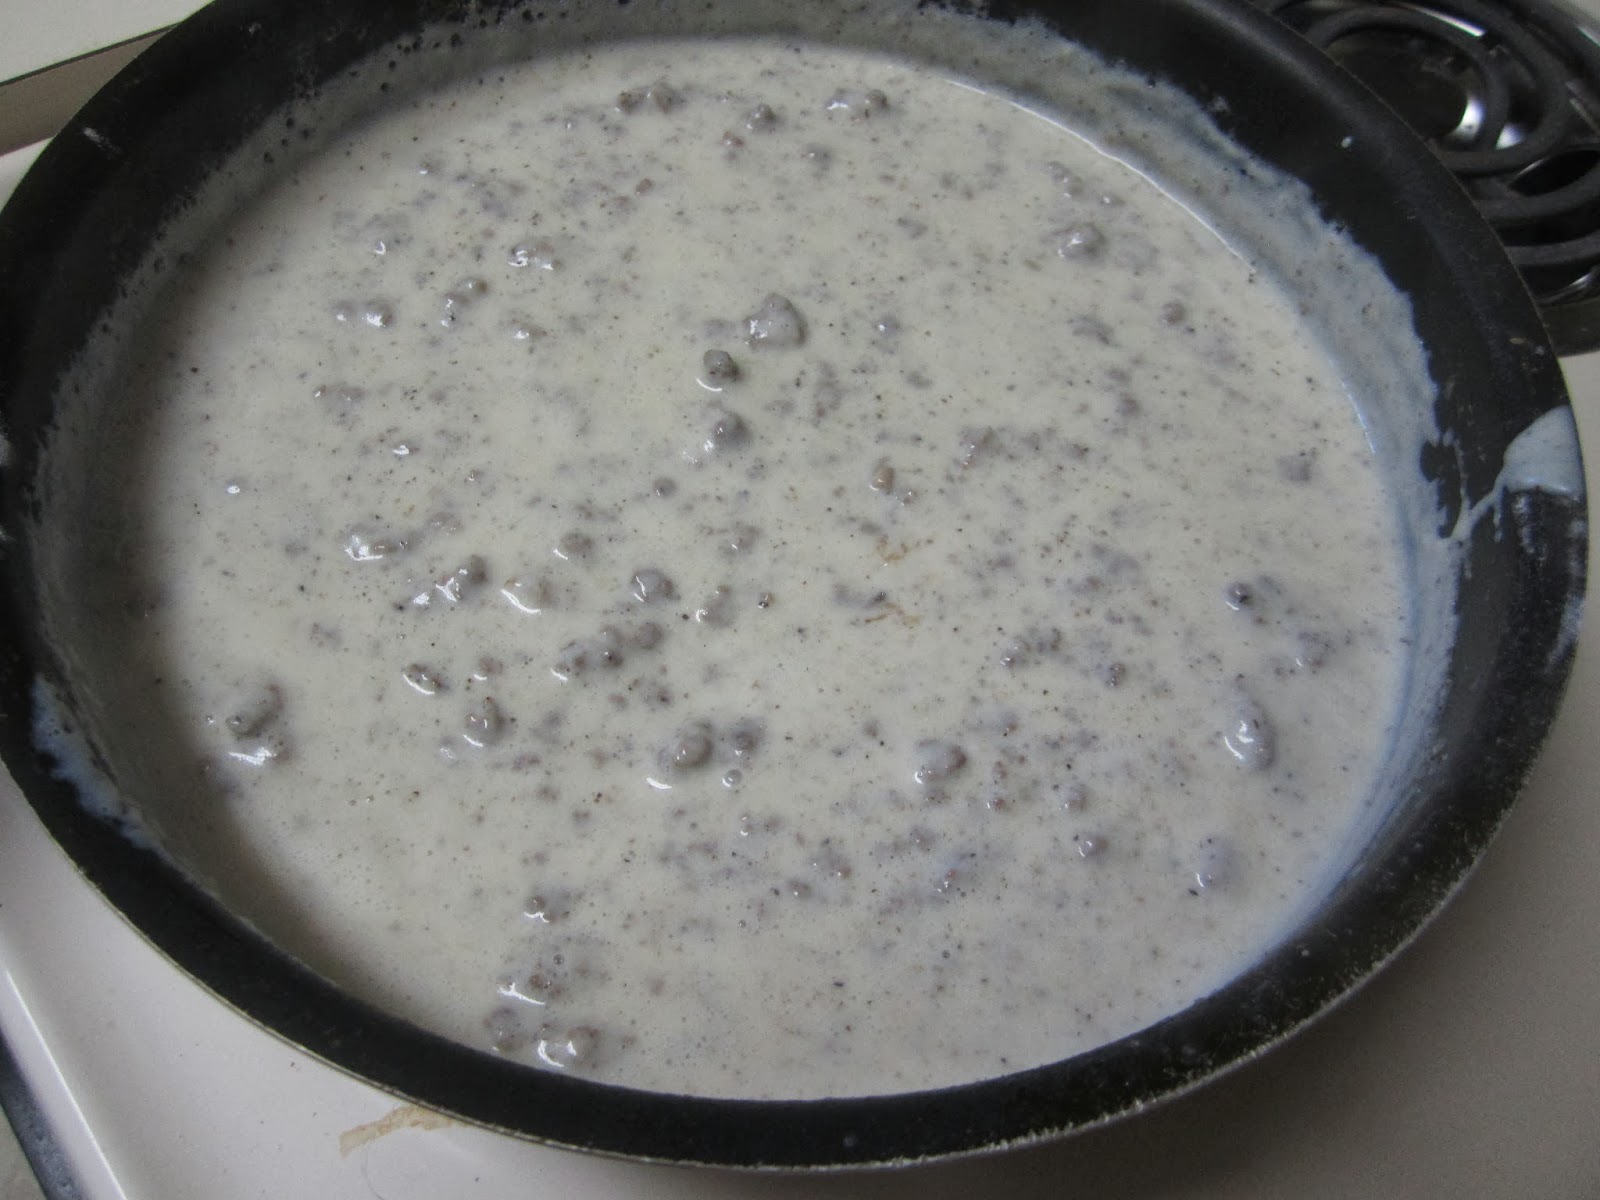
The ultimate comfort food when it comes to breakfast!  Mom was always the major cook in the house but when it comes to breakfast, dad was the boss. :)  His specialties are the most AMAZING pancakes ever (I'm sure I'll put that recipe up sometime) and his hamburger gravy to slather on some piping hot biscuits.  This is not a traditional recipe but I prefer it over using sausage because it's still a unique flavor.

Dad's Hamburger Gravy


*makes 2-3 servings


1/2 lb. Hamburger
3-4 Tbsp. Flour
2 1/2 C. Milk
1 Tube of Biscuits
Salt and Pepper

1. Preheat oven for the biscuits.  Start browning the hamburger.  Be liberal with the salt and pepper.  You don't want the meat to be bland once the gravy is made.


2. Once the hamburger is brown, add the flour and stir to coat the meat and absorb the grease.


3. Put the biscuits in the oven.
4. Keeping the heat at about med-high, add the milk and stir often until it starts to boil.


5. Lower the heat to med-low and simmer while it thickens.  Still stirring often to make sure the gravy doesn't stick to the bottom of the pan.


6. Season with salt and pepper (heavy on the pepper).  The biscuits should be done by now, pull them out and put it all together!

Dig in!!!

Saturday, September 14, 2013

Philly Cheese Steak Bites

There's a quaint place that I have to visit every time I'm in LA called Phillipes that is just to die for!  I don't think I enjoy my french dip sandwiches as much anywhere else.  I don't often make my own french dips or philly cheese steaks either, but hey why not take it for a spin!

Philly Cheese Steak Bites


*makes 12-16 bites


2 tubes of Crescent rolls
1 package of roast beef (using 2 slices per roll)
6-8 slices of cheese [usually provolone but I'm not a fan] (cut in half diagonally)
1/2 Onion (sliced)
1 Green Bell Pepper (sliced)
2-3 tsp. Olive Oil
1 packet Au Jus gravy

1.  Put the oil in a skillet and add the veggies.  Let these cook on one side for 5-8 mins and then stir/flip them as best as you can to the other side.  When these are done, preheat the oven according to the rolls.
2. Open up the rolls and start separating them.  Lay the cheese down on each roll with the long edges together.
3. Then layer 2 slices of roast beef, add 2 strips of bell pepper and 2-4 pieces of onion.  Roll up and put on a cookie sheet lined with tinfoil and sprayed with non-stick spray.

4. Cook them for 10-12 mins.
5. Prepare the au jus while the rolls are cooking.
6. Serve it all up and enjoy!


(the roast beef tends to weep a little so the bottoms don't stay crisp, I recommend a fork and knife)

Saturday, August 31, 2013

Sausage Sliders

Saturday morning is my favorite day to make breakfast (and usually the only morning in the week I can find the time).  I was feeling a bit adventurous this morning since I've been living on fast food breakfast this week. :(  I wanted to get a little crazy and make my own breakfast sandwich with a biscuit.  The biscuits I use are small and fluffy and not hard and dense like McDonalds.  It makes for a fun breakfast!

Sausage Sliders


*makes 8 sandwiches

1 Tube of Sausage (I use Jimmy Dean's Hot Sausage)
2 Slices of Cheese (My favorite is pepperjack!)
2 Eggs
1 Tube of Buttermilk Biscuits


Salt, Pepper

1. Preheat oven according to your biscuits.  Get your pans ready for the sausage and eggs.  Put the biscuits in as soon as it's ready.
2. Start cooking the sausage patties.
3. About the time you flip your sausages to the other side you can start frying your eggs.  Season them as you like with salt, pepper, maybe some garlic or parsley.  I personally don't like a ton of egg, but if you are an egg lover, then you can up how many eggs you actually use.  I used two and cut them into quarters.
4. About this time, the biscuits should be close to done if they aren't already.  When the saugage is done, put a 1/4 of the cheese slice on top to start melting.
5. Assemble everything and serve!


**These would have been awesome with some gravy to dip in, but I didn't have any. :(

Sunday, August 18, 2013

Beef N Broccoli

I love me some yummy Chinese food.  I'm suuuuuuuuuuuuper picky about stuff we order for takeout!  That's why I started making my own stuff. :)

Beef and Broccoli is so simple yet can be so complex!!  I decided to make a crock pot version and messed with it to make it yuuuuuuuuuummy!!!  This is definitely a treat in my house this week!

Beef N Broccoli


*makes 4 servings

Allergen Tips:
Choose a gluten free soy sauce made by Kikkoman or Tamari.

1 lb. Flank Steak (Cut in strips and then cut in half)
1 C. Beef Broth (I used water and 2 cubes of bullion for a stronger flavor)
3 Cloves Garlic (minced)
1/2 C. Soy Sauce
1/3 C. Honey
1 Tbsp. Oil (sesame is recommended but vegetable works if you don't have it handy)
1/2 tsp. Salt
1/2 tsp. Pepper
2 Tbsp. Cornstarch
2-3 Heads of Broccoli (chopped)

3/4 C. Brown Rice
1 1/2 C. Water


1. Place beef in a crock pot.
2. In a small bowl, combine broth, soy sauce, honey, oil, garlic and salt/pepper. Pour over beef. Cook on low for 4-5 hours.
3. After that time, in a cup, stir cornstarch and just a little sauce from the crock pot until smooth. Add to crock pot. Stir well to combine.  Repeat if it's not thick enough for you.
4. Add broccoli to the crock pot. Stir to combine.

5. Start the rice by mixing with water.  Bring to a boil, cover and simmer for about 30 mins.
6. Cover beef and broccoli and cook an additional 30 minutes on high.

7. Combine and enjoy! :)

Sunday, June 30, 2013

Chipotle Cilantro Rice

Well, Chipotle is one of my guilty pleasures when it comes to eating out.  I've been known to travel to different cities just to get a burrito bowl covered in all the yummy goodness that they offer!  I've been trying to recreate their food for YEARS and I've finally nailed the rice!  Hope you all enjoy the recipe!

Cilantro Rice

*makes 3-4 servings

1 C. Brown Rice
2 C. Water
2 Tbsp. Butter
1 Lime (cut in half and juiced)
1 Tbsp. Cilantro (finely chopped)
Salt to taste

1. Put the butter, rice, and half the lime juice in a pot and stir until the butter is melted.
2. Add the water and around 1/8 tsp of salt.  Bring to a boil.
3. Lower the heat to just below med-low and cover.  Cook until the water is all gone.  (usually just over 30 mins)
4. Take it off the heat and let it sit for about 5 mins.
5. Add the other half of the lime juice and the cilantro as well as a little more salt to taste.  Stir well and add to ALL your Mexican dishes!!!

Tostitos Taco Bites

I love making my taco bites with wonton wrappers!  They're fun and inventive but sometimes I'm feeling a little lazy.  The solution?  Bite size taco bowls of course!

Tostitos Taco Bites

*Makes 30-45 bites (depending on filling)

Allergen Tips:
Be sure to read the fine print on your taco seasonings for a g-free dinner!

1/2 lb. Ground Turkey (or hamburger)
1/4 C. Bell Pepper (chopped)
1/4 C. Onion (chopped)
1 Taco Seasoning Packet (or close to 1/4 C. if you have a large container)
3/4 C. Water
Tostito's Scoops
1/4 C. Shredded Cheese
Olive Oil or Butter for Veggies
Salt, Pepper, Garlic Powder to taste

1. Cook bell peppers and onions with oil or butter for about 8 mins on just above medium.  Add turkey or beef.  Season and brown and then drain fat.
2. Add the taco seasoning and water.  Bring to a boil and then reduce to med-low.  Simmer for 20-25 mins or until the liquid is almost gone.
3. Set oven to broil with the rack at the very top.  Place chips on a cookie sheet lined with foil.  Add the meat and cheese.  Place in oven for about 45 seconds to melt the cheese.
4. Serve with lettuce, olives, sour cream or whatever else sounds good!

Monday, May 13, 2013

Mom's Green Beans

I love green beans of all shapes sizes and recipes!  My mom used to make the best green beans growing up with bacon!  I made it last night out of nostalgia and man did I enjoy them!  It's been years since I've had em!    Who doesn't love a little bacon?!

Mom's Green Beans

*Makes 3 Servings

1 Can French Style Green Beans
2 Slices of Bacon
Salt, Pepper, Garlic Powder to taste

1. Fry the bacon til it's slightly crispy.  Remove from pan and cool.
2. Add green beans to the bacon grease in the pan.  Season and fry them for about 5-7 mins.
3. Chop up the bacon into small pieces.  Throw them back in right before you serve.
4. Eat healthy veggies slathered in bacon grease! :)