Showing posts with label Dairy Free. Show all posts

Wednesday, April 9, 2014

The Perfect Green Smoothie

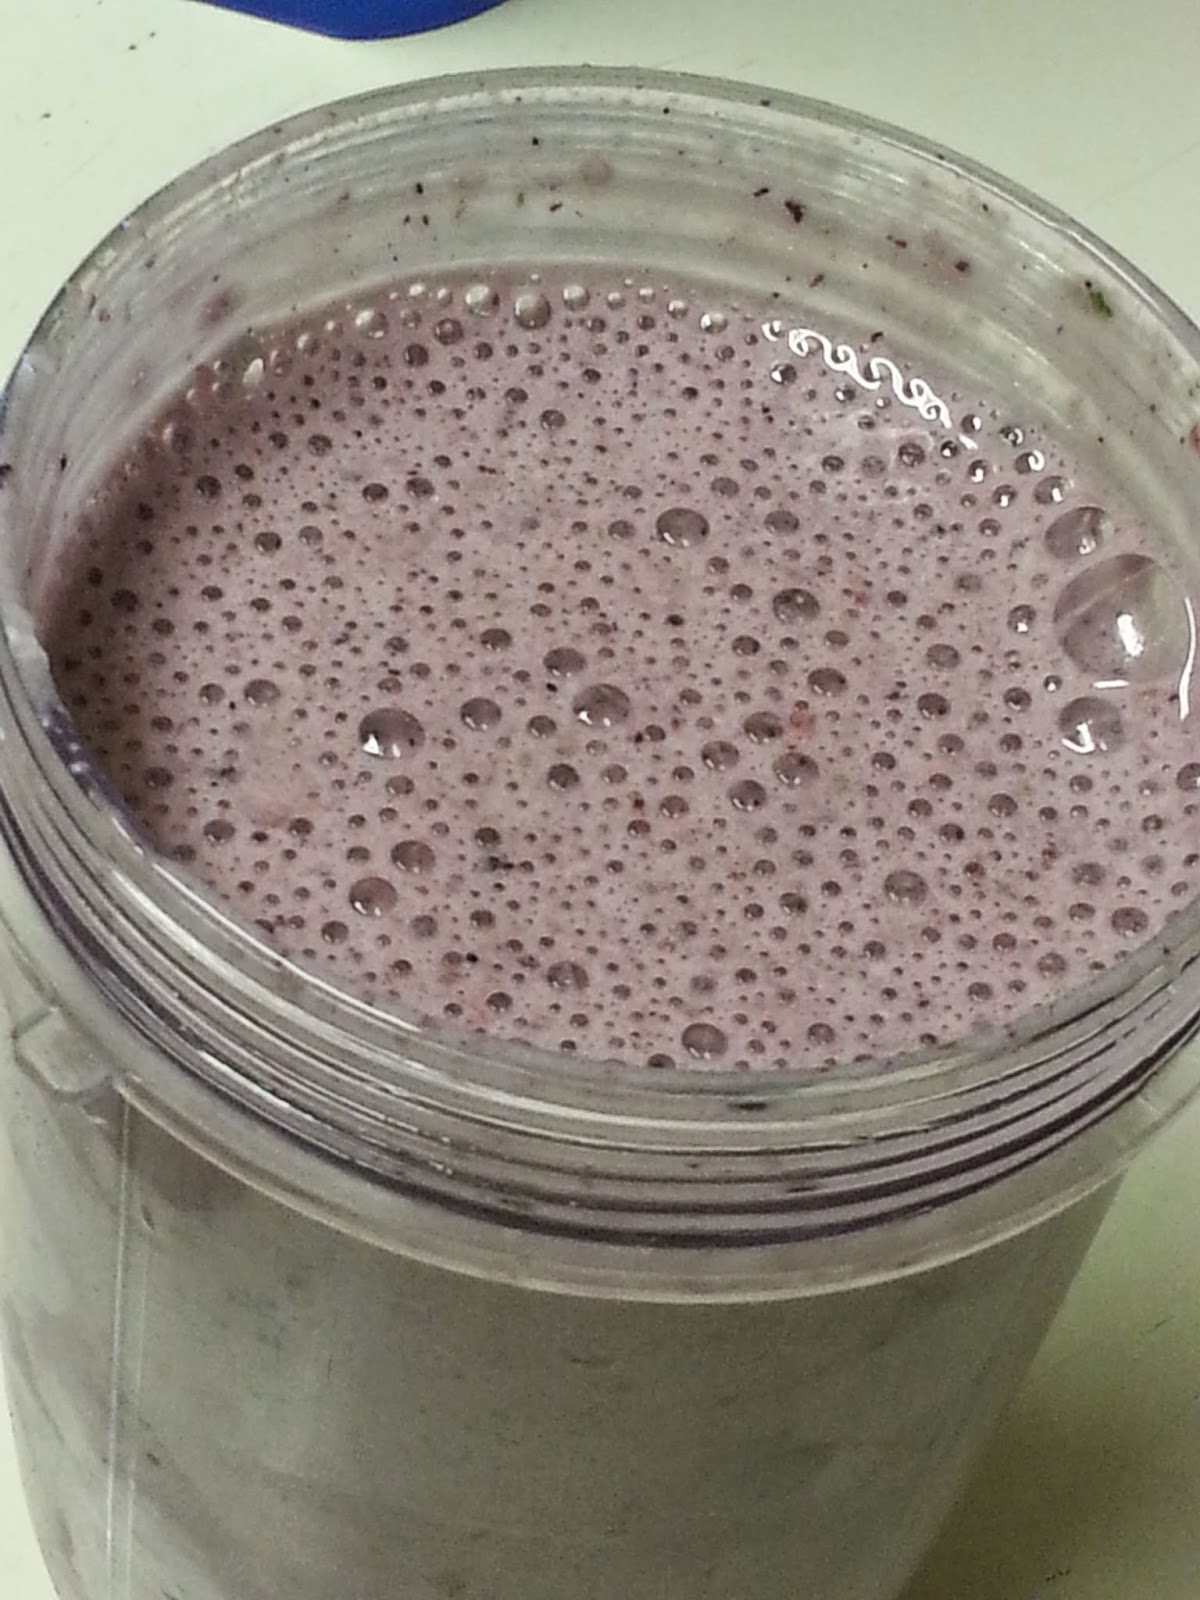
Ah the smoothie...  What an intimidating meal when you don't have a worthwhile blender!  I must admit I went years without making them just because of that!  Between my lack of breakfast choices and my grumbly tummy every morning at work, I decided that it was probably time to get on the ball.  I asked the Shrinking Jeans community for tips, pointers, recipes, ideas, etc.  The diversity is endless based on your own personal preference!  This chart lays out the perfect ratio for a green smoothie, but you have to have quite a large blender of some sort for it, so below, I'm going to share my amounts that makes just the right amount for one person in a Magic Bullet (which is what I happen to have).  My smoothies are low in calories, gluten free, full of protein, and super tasty!  What's not to love?!


My Single Serving Formula:


*makes 16oz smoothie

1 C. Almond Milk
1/2 C. Spinach
1 Scoop Protein Powder (I go with Vanilla Whey Protein but you can go Soy for dairy free options)
1 C. Fruit

The directions are the same as the picture above and it comes out perfectly full every time for me :)

Different fruit combo choices:
*I'm a touch biased when it comes to fruits I like.  I also use frozen fruits because it's easy to portion and defrost the night before.*

Strawberries
Raspberries
Blackberries
Blueberries

Strawberries
Banana
(I like to add peanut butter and use chocolate protein powder in this one)

Peach
Mango

Strawberry
Peach
Pineapple

Strawberries
Blueberries

Go bust out your blender/Bullet/Ninja or whatever else you have and get some green in your diet! :)

Thursday, February 6, 2014

Green Chile Chicken Soup

When you're sick, soup is the staple of your diet.  I've been sick for almost a week now and man do I get tired of Chicken Noodle quick!  So instead of busting out my Chicken and Dumplings (too much work when I'm sick) I went into the kitchen with no thoughts or recipes in my head.  And here's what I ended up with!  It's got just a tiny kick (unless you know you're in possession of super spicy green chiles) and it's really low in calories but super filling.  It's also really easy to keep.  You can freeze it or seal it in jars using a pressure canner.

Green Chile Chicken Soup


*makes 12 2 cup servings

Allergen Tips:
Look for gluten free brands of enchilada sauce like La Victoria or Frontera.
Check the bullion for gluten to keep it a g-free recipe!

12 Cups of Water
7 cubes of Chicken Bullion
3 Boneless Skinless Chicken Breasts
4 Stalks of Celery (chopped)
2 Red Bell Peppers (chopped)
1 C. Chopped Onion
4 Fresh Roasted Green Chiles (chopped) **or 2-3 4oz cans of green chiles**
2 cans Black Beans (drained)
2 cans Corn (drained)
1 14-16oz Can Green Enchilada Sauce (size varies depending on brand)
1 tsp. Salt
1 tsp. Garlic Powder
1 tsp. Pepper
1 tsp. Cumin
1-2 Tbsp Corn Starch for thickening

1. Put the water and bullion cubes in a stock pot on medium heat until it starts boiling and the cubes are dissolved.
2. Throw in the chicken breasts, beans and veggies and the sauce.  Cover back up and cook for about 45-75 depending on if the chicken is fresh or frozen.
3. Once the chicken is done, pull it out and shred.  Add back to the soup along with the seasonings and simmer for another 30 mins to let the chicken soak up some flavor.
4. Serve!

*Tips on adding to this if you'd like a little more*
You can make some rice to pour this over or you can make some noodles to throw in but if you plan on keeping this in the fridge or freezer, I don't suggest adding these until you're about to eat it.


Saturday, February 1, 2014

Onion and Herb Squash

I LOVE squash and Zach hates it...  That means I almost never get to eat it unless I make it specifically for me.  (and I'm just not one to prepare two different meals for people)  That means, on the nights he's not home, I get to break out all the things I love!  This dish took quite a bit of time to put together and then bake, but it was SO worth it!

Onion and Herb Squash


*Makes 4 servings

3 Yellow Squash
2 Large Zucchini
2 Tbsp. Parmesan
Salt, Pepper, Onion Powder, Garlic Powder, Mrs. Dash Onion and Herb seasoning
1.5 Tbsp. Olive Oil (give or take)

1. Slice the squash with a mandolin or with a knife.  It's better if they're thinner but whatever you do works!
2. Drizzle the olive oil on them and mix well.
3. Cover a cookie sheet with tin foil and spray with non-stick spray.
4. Set oven to 375 degrees.
5. Start layering the squash.  If you're OCD like I am, alternate zucchini, yellow squash, repeat.


6. Once it's all laid out, season well with all the above.
7. Put it in the oven for 45 mins.  Add the parmesan when there's 12 mins left.
8. Pull out and enjoy!


Tuesday, July 9, 2013

Eggie Bites

Eggie Bites


*Makes 6 Bites

Allergen Tips:
Check your meat labels and always be aware of cross contamination when you buy from the deli when it comes to gluten!
Just omit the cheese for a healthy, yet dairy-free option!

6 Slices of Lunch Meat (Ham, Turkey, Chicken, Roast Beef, or whatever else you love)
4 Eggs (scrambled)
2 Tbsp. Shredded Cheese
1 Tbsp. Green Onions
2 Tbsp. Bell Peppers
2 Tbsp. Onion

1. Set the oven to 350 degrees.
2. Scramble the eggs with the seasonings.  Add the bell peppers, onions, cheese, or whatever other veggies you'd like. (OR you could get crazy and add some bacon or sausage)
3. Spray the muffin tin with non-stick spray.  Line the cups with the meat.  Pour in the eggs.
4. Top with the green onions as garnish and bake for 25-30 mins.

Sunday, June 30, 2013

Lazy Game Hens

I love chicken.  I could eat it 7 days a week!!!  (oh wait I almost do!)  I find my creativity is almost endless even with boneless skinless chicken breasts.  The boyfriend doesn't like bones in chicken so I never get to cook with normal chicken!  Such a shame and a lack of flavor!  But I've learned all the in's and out's of the boneless stuff to make all kinds of fancy stuff.

I have been DYING to make a cornish game hen because I love how small and cute they are!  They're perfect for one person!  I've been thinking of making one since the last time I was in Vegas and we got dinner and a show where they served game hens.  Very inspiring to my imagination!  So out of curiosity I decided to make them in a crock pot.

Lazy Game Hens

*makes 2 hens

2 Cornish Game Hens (still frozen)
1 Onion (chopped)
3-5 Tbsp Olive Oil (depending on how generous you want to be)
Salt, Pepper, Garlic (preferably fresh but powder works), Onion Powder, Rosemary, Thyme
3/4 C. White Wine

1. Sprinkle salt, and pepper on the bottom of the crockpot.  Drizzle 2 Tbsp oil on the bottom of the pot.
2. Add onion to the crock pot.
3. Put the hens on top of the onion.  Drizzle a generous amount of olive oil over the hens.  Sprinkle with salt, pepper, onion powder, rosemary, and thyme.  If you're using fresh garlic, place several slices on top of the chicken and put the rest around it on the bottom with the onions.  If you're using powder, be generous on and around the chicken.
4. Pour in the wine but don't pour over the chicken or else all that seasoning will be a waste!
5. Cook on low for 6 hours.


6. Pull out and enjoy your fall off the bone chicken!

Sunday, May 12, 2013

Rosemary Chicken and Roasted Potatoes

After craving red potatoes for a month I decided that I needed to break out the ol' Pyrex to make some roasted potatoes!  What better combo than with chicken?!?!  This is my version of a classic dish. :)

Rosemary Chicken and Roasted Potatoes


*Makes 3-4 Servings

2 Boneless Skinless Chicken Breasts (cut vertically to make 4 chicken fillets)
6-8 Small Red Potatoes (cut into 1 1/2" cubes)
1 Bell Pepper
1/2 Small Onion
1/4 C. Parmesan
3 Tbsp. Green Onions (chopped)
3-4 Tbsp Olive Oil
1/2 Tbsp. Parsley
1/4 tsp. Basil
1/2 Tbsp. Rosemary
1/2 tsp. Paprika
1/2 tsp. Pepper
3/4 tsp. Salt
1 tsp. Garlic Powder

1. Cut up the potatoes and put in a large pot full of hot water.  Turn the burner on to high.  Take off the stove and drain as soon as the water starts to boil.  Put in a bowl to the side.
2. Set oven to 400 degrees.  Spray a 9X13 pan with non stick spray.  Sprinkle a little salt on the bottom.  Lay chicken side by side.
3. Add bell pepper and onion to the potatoes.  Add the oil and all the seasonings.  Mix well!
4. Spread the potatoes over top of the chicken.  Sprinkle the Parmesan and green onions on top.  Put in the oven for 35 mins.
5. Enjoy! :)


 Before and After :)

Friday, January 4, 2013

Mexican Loaded Taters

Yet another use of my Black Bean Salsa is making really healthy twice baked potatoes!  It tends to be much healthier than loading it full of sour cream and bacon!

Mexican Loaded Taters

 *Serves 2

2 Small-Medium Russet Potatoes
1/3 C. Chunky Salsa (photographed with my black bean salsa)
Olive Oil
Salt, Pepper, Garlic Powder, Chili Powder

1. Wash the potatoes really well and stab all over with a fork.  Put them in a microwave safe dish. drizzle olive oil on them and roll them around.  Microwave for 6-8 mins depending on the size.  Preheat the oven to 350 degrees.
2. Take out and cut in half.  Spoon out the insides and mix with the salsa. 
3. Place the skins in an oven safe dish that's sprayed with non-stick spray.
4. Spoon the mixture into the skins and sprinkle the seasonings on top.
5. Bake for 20-25 mins. 

Chicken Tortilla Soup!

As mentioned throughout my wonderful blog, I am a terribly picky eater.  Add tortilla soup to my list of things that have to be JUUUUUUUUUUST right.  I am in love with Cracker Barrel's tortilla soup and to be honest, nothing else compares!  I decided to take the jump into the wonderful world of soup making.  And my first soup, chicken tortilla!  It's not quite finished as I'm writing this but man is it tasty!

Chicken Tortilla Soup

*Makes 8 servings

Allergen Tips:

Check the bullion for gluten to keep it a g-free recipe!
Look for gluten free enchilada sauce, La Victoria is one option! 
Skip the cheesy toppings for a dairy free dish.

3 Boneless Skinless Chicken Breasts (frozen)
6 C. Chicken Broth (I use bullion cubes)
1/2 Medium Onion (chopped)
1 Can Red Enchilada Sauce (15 oz)
1 Can Corn
1 Can Black Beans (15+ oz rinsed!!!)
1 Can Diced Tomatoes (15 oz mashed)
1 Can Green Chiles (4 oz)
2 Cloves of Garlic (minced)
Salt, Pepper, Garlic Powder to taste
1 tsp. Cumin

1. Open everything.
2.  Dump in a crockpot! (low 6-8 hours, high 3-5 hours)
3. Near the end of it being done, pull chicken out and shred it.
4. Add cheese, tortilla strips, sour cream or whatever your heart desires and enjoy!
(Nutrition Facts do not include the extras!)

Friday, December 21, 2012

Chipotle Marinade

Who doesn't like a nice smoky, spicy piece of meat?!  I'm tired of buying marinades that aren't worth the price (even though I love the flavors).  So here comes the chipotle marinade that's easy to play with and you can use on any cut of meat!

Chipotle Marinade

** served with Smash-ed Tatoes**
*Makes enough for 2 pieces of meat

3 Tbsp. Olive Oil
2 Cloves of Garlic (chopped)
1 tsp.-1 Tbsp. Honey (depending on if you like a subtle sweet with your spice)
1/4 tsp. Cumin
2-5 Chipotle peppers (from a can in adobo sauce) ((2 is a touch of spicy, 5 is a good kick in the mouth))
1 tsp. Salt
1 tsp. Pepper

1. Put all the ingredients in a food processor or a blender and mix until it's no longer chunky.
2. Here is where you can play with the flavor a bit.  You can add green onions, regular yellow onions, herbs, or other spices.
3. Pour over the meat and marinate.  Cook how you like it.  I love to grill it.

*marinating times*
Chicken- 24 hours
Steak- 12-24 hours
Fish- Who knows... I don't eat the stuff :)

Wednesday, November 28, 2012

Beef Jerky, What What!

My mother used to make beef jerky whenever a cut of london broil was on sale (which in my hometown is like once a year).  I would dream about it all the time and now that I'm all grown up, I can make my own!  While I don't have a dehydrator, I make use of the most basic thing in my kitchen, the oven!

Beef Jerky

 I made too much and it didn't all fit! O.o


*Marinades 2-3 lbs of meat

Allergen Tips:
Choose a gluten free soy sauce made by Kikkoman or Tamari.
Stay away from the liquid smoke to keep it g-free!

2-3 lbs of Meat (I use flank or london broil because of the low fat content)
1/2 C. Soy Sauce
1/3 C. Worcestershire Sauce
1 1/4 tsp. Onion Powder
1 1/4 tsp. Garlic Powder
2 tsp. Pepper
Here is where you can play with it a bit.
1 tsp. Liquid Smoke or 2 Tbsp. Brown Sugar or once you finish a layer, sprinkle it heavy with more pepper for that extra spicy kick!
*You'll need a lot of paper towels for this*

1. Slice your meat against the grain in very small slices and put them in a container or a ziploc gallon size bag. (you might consider splitting this into two bags and either freezing one after you add the marinade because there's not enough room for all the meat in one batch.\
 2. Mix all the ingredients together in a bowl and pour into or over the meat.
3. Make sure the meat gets covered well by the marinade and refrigerate for 12-24 hours.
4. Once it's done marinating, dump the bag into a bowl or just pull out the container.
5. Doing small batches at a time, spread the meat out on paper towels and dab to get the loose marinade off of it.  *Set the oven to the lowest setting, as close to 140 degrees as you can get it!)
6. I use stackable cooling racks and lay the meat out as close together as I can get it.  Other ways to do it would be to use a skewer and thread the top of the meat and hang these from the oven rack on the highest slot in the oven.  Either way, I have a cookie sheet underneath to catch anything that drips.
7. As you get the jerky ready for the oven, you might consider adding seasonings to give it that extra pop (i.e. peppered jerky, or red pepper flakes).
8. Once all the meat is ready to go, put it in the oven and prop the oven open with a wooden spoon for just a little circulation.
9. Depending on how thick your meat was sliced, cook for 5-9 hours.  To tell if it's ready, it should crack a bit when you fold it in half but not snap.
10. Pull the jerky out and let it fully cool before you package it up.  You can freeze it in jars for up to 4 months or keep it in the fridge for 1-2 months depending on how fatty your cut of meat was.
11. ENJOY and don't eat it all in one sitting!!!

(These facts are using london broil not flank!!)
(Serving size is 4-6 pieces depending on how thick or long you cut them)